1 How to Cleanup WinSxS in Windows 10 with Task Scheduler2 How to Cleanup WinSxS with the StartComponentCleanup Command3 How to Clean up the Component Store and Delete All Old Component Versions4 How to Clear Service Pack Backup Components via DISM5 How to Perform an Extended Disk Cleanup to Free Up More Space
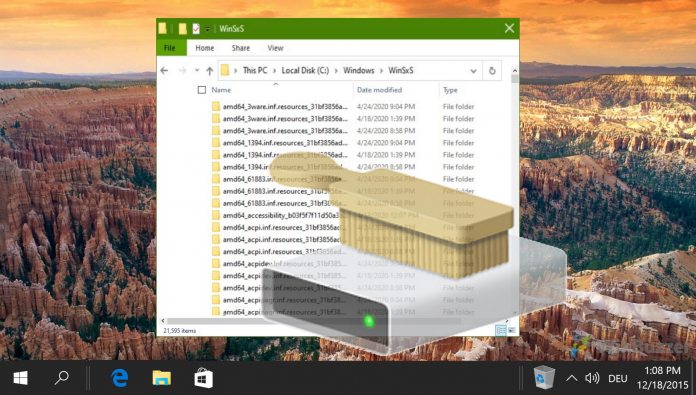
What is WinSxS? The WinSxS folder, also known as the component store, holds all essential Windows components. Though you may see such components elsewhere in Windows 10, in reality, they’re just links back to WinSxS, which handles the heavy lifting. As a result, deleting WinSxS would not be good. There’s a good chance your system would be unable to boot, and as WinSxS also contains backups of older component versions, you may not be able to repair, either. However, that’s not to say the Windows SxS folder doesn’t contain files you don’t need. It keeps older versions in case you need to roll back to an older version of Windows 10, which means it grows with each Windows Update. If you’re happy with your system stability, it’s possible to perform a WinSxS folder cleanup and regain some space. Generally, Windows 10 is quite good at doing this automatically, but if you need space right now, you may not have time to wait for its scheduled maintenance. We’re going to show you how to safely clean WinSxS so you can get your system running smoothly again.
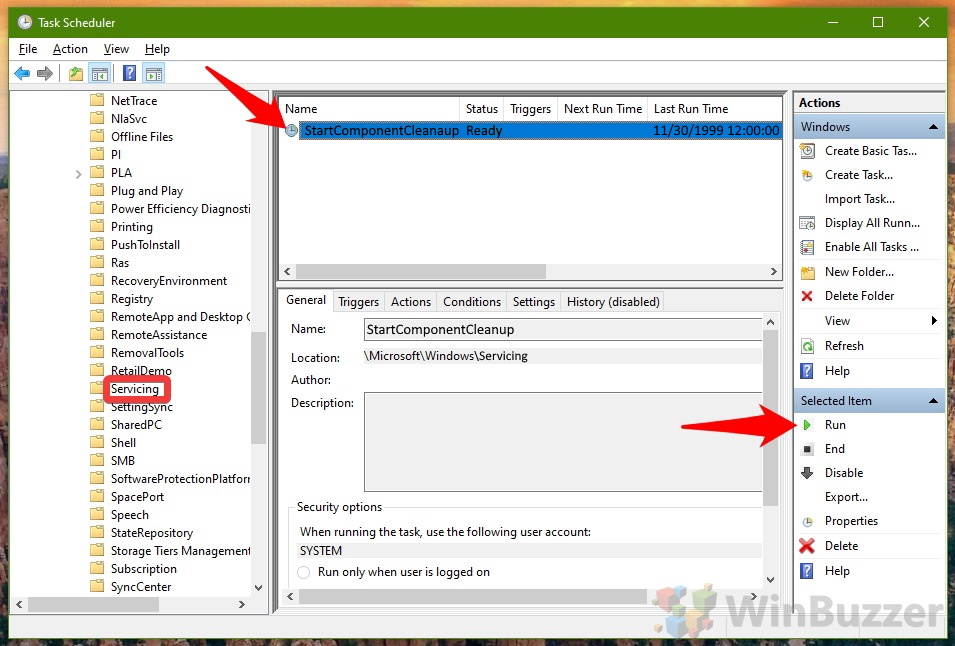
How to Cleanup WinSxS in Windows 10 with Task Scheduler
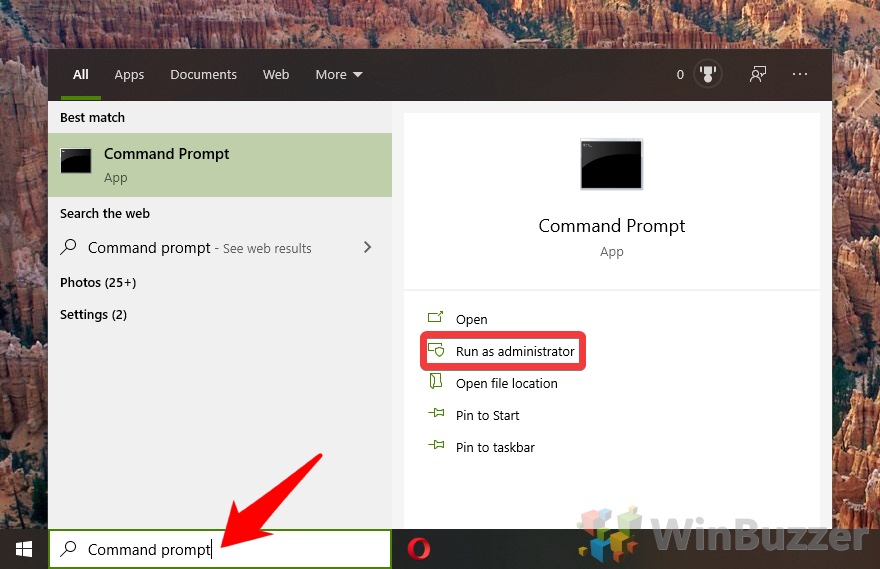
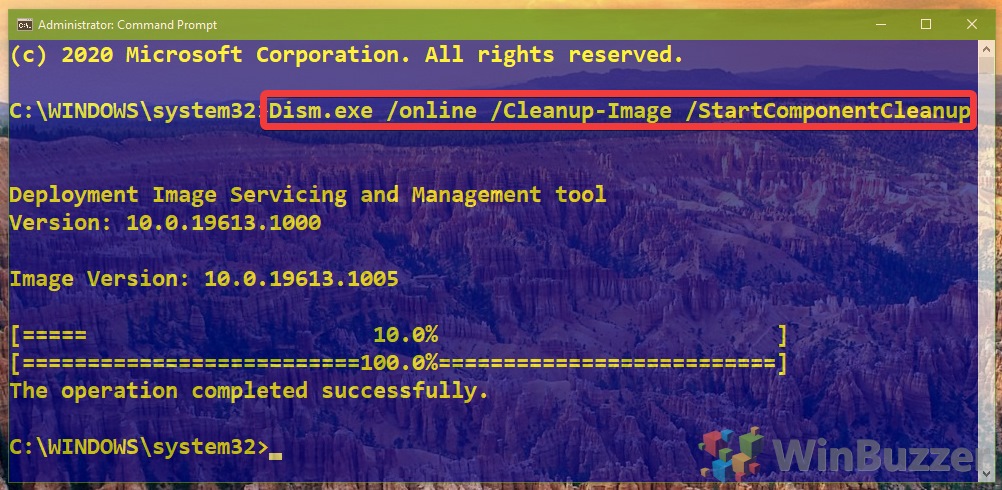
How to Cleanup WinSxS with the StartComponentCleanup Command
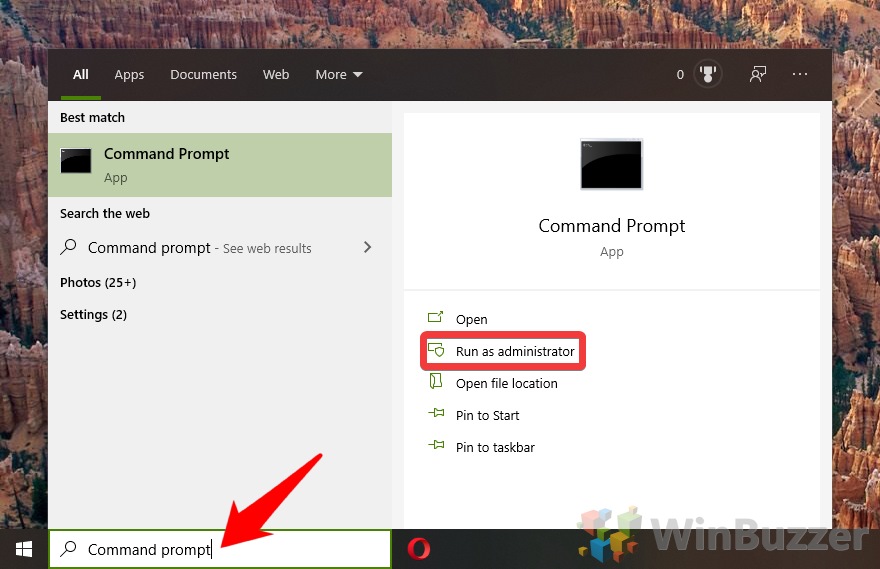
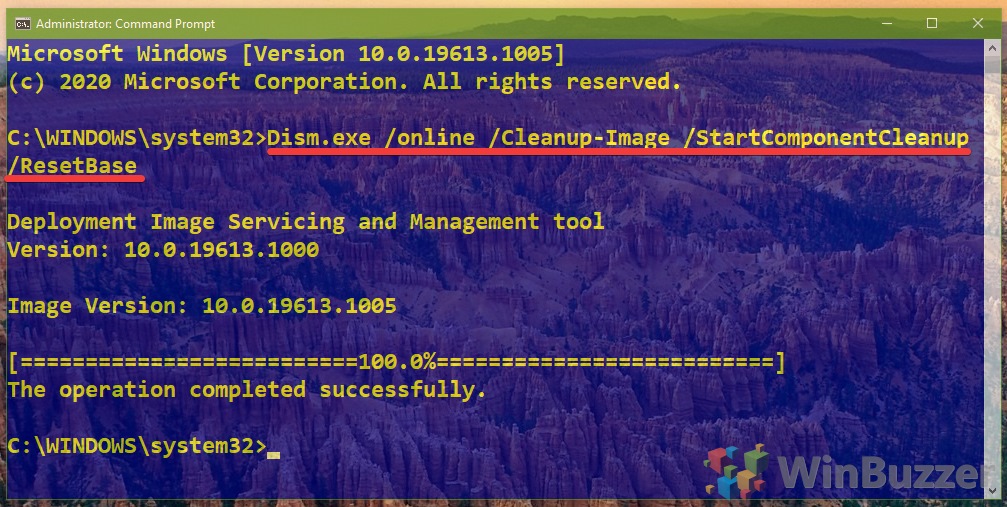
How to Clean up the Component Store and Delete All Old Component Versions
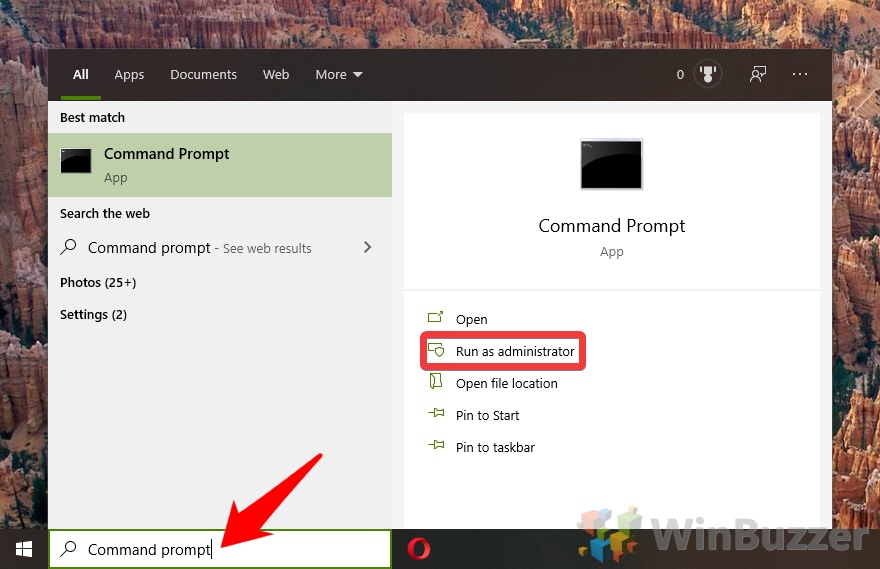
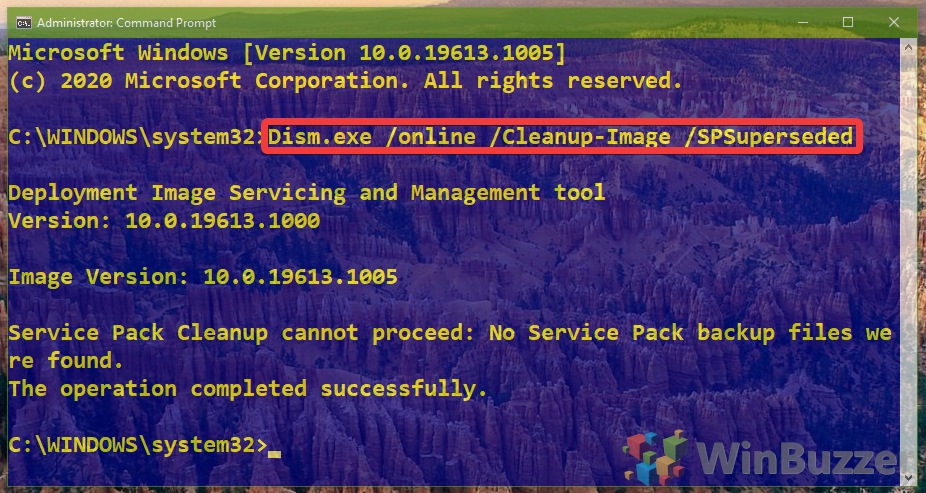
How to Clear Service Pack Backup Components via DISM
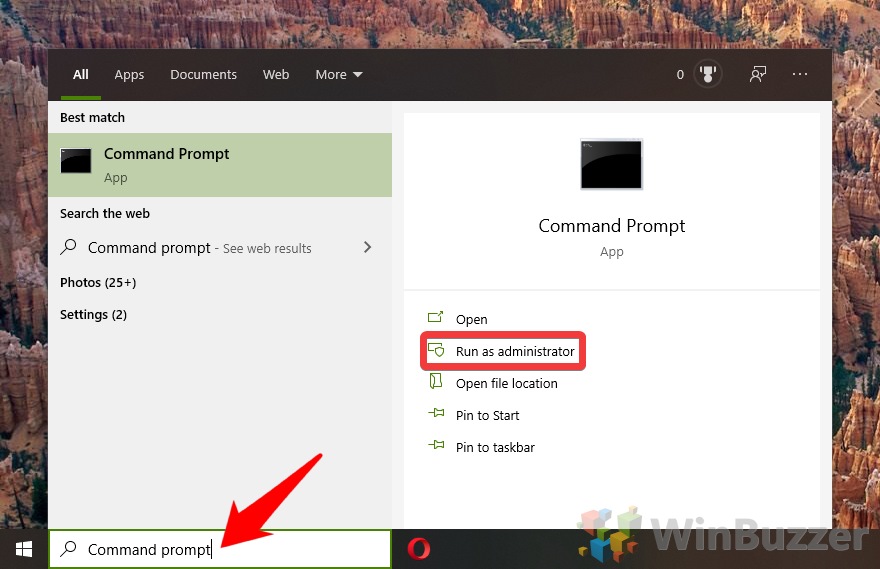
How to Perform an Extended Disk Cleanup to Free Up More Space
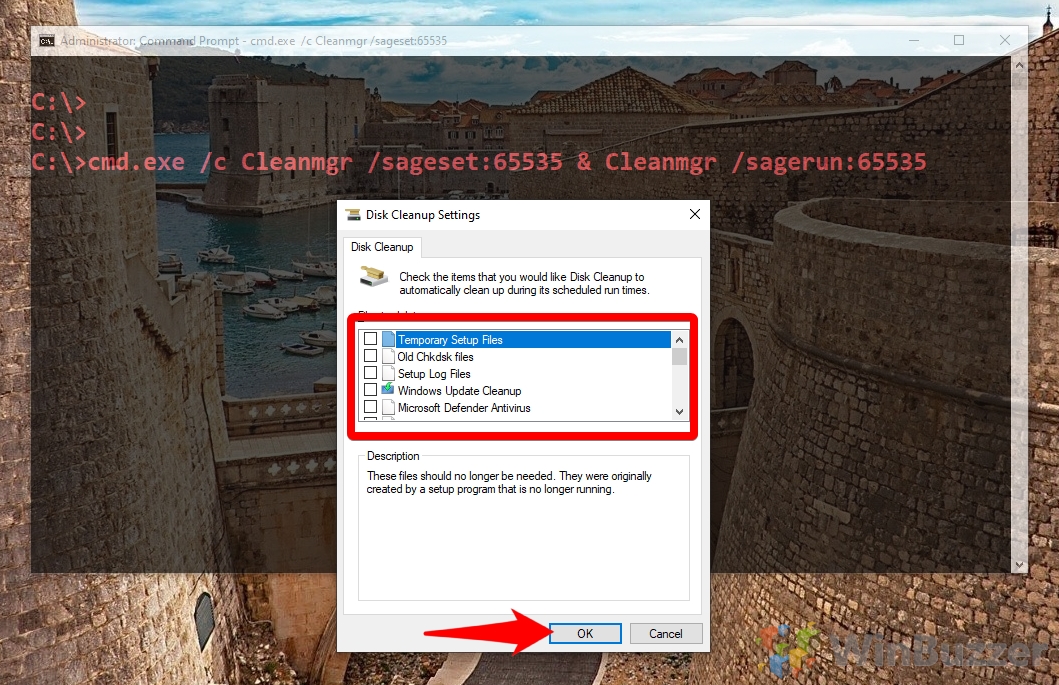
Press “Enter” and wait for it to complete. Wait for it to finish and close Command Prompt. Windows 10 will then launch the Extended Disk Cleanup tool. Tick the files you’d like to remove, including “Windows Update Cleanup” if you want to delete WinSxS files. Wait for the process to complete, keeping Command Prompt open while it does so.
