1 How to Create a Flowchart in Word with Shapes2 How to Make a Flowchart with SmartArt in Word
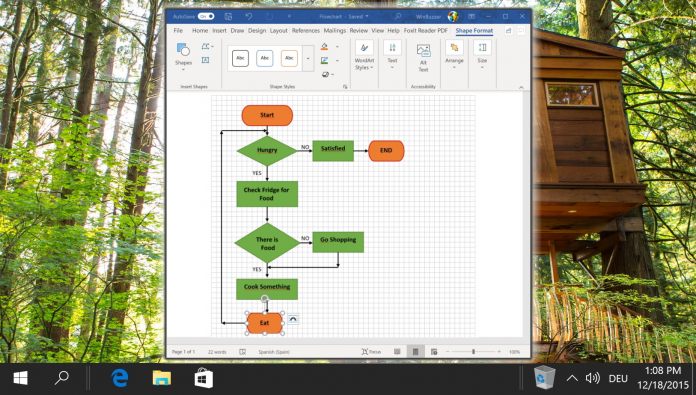
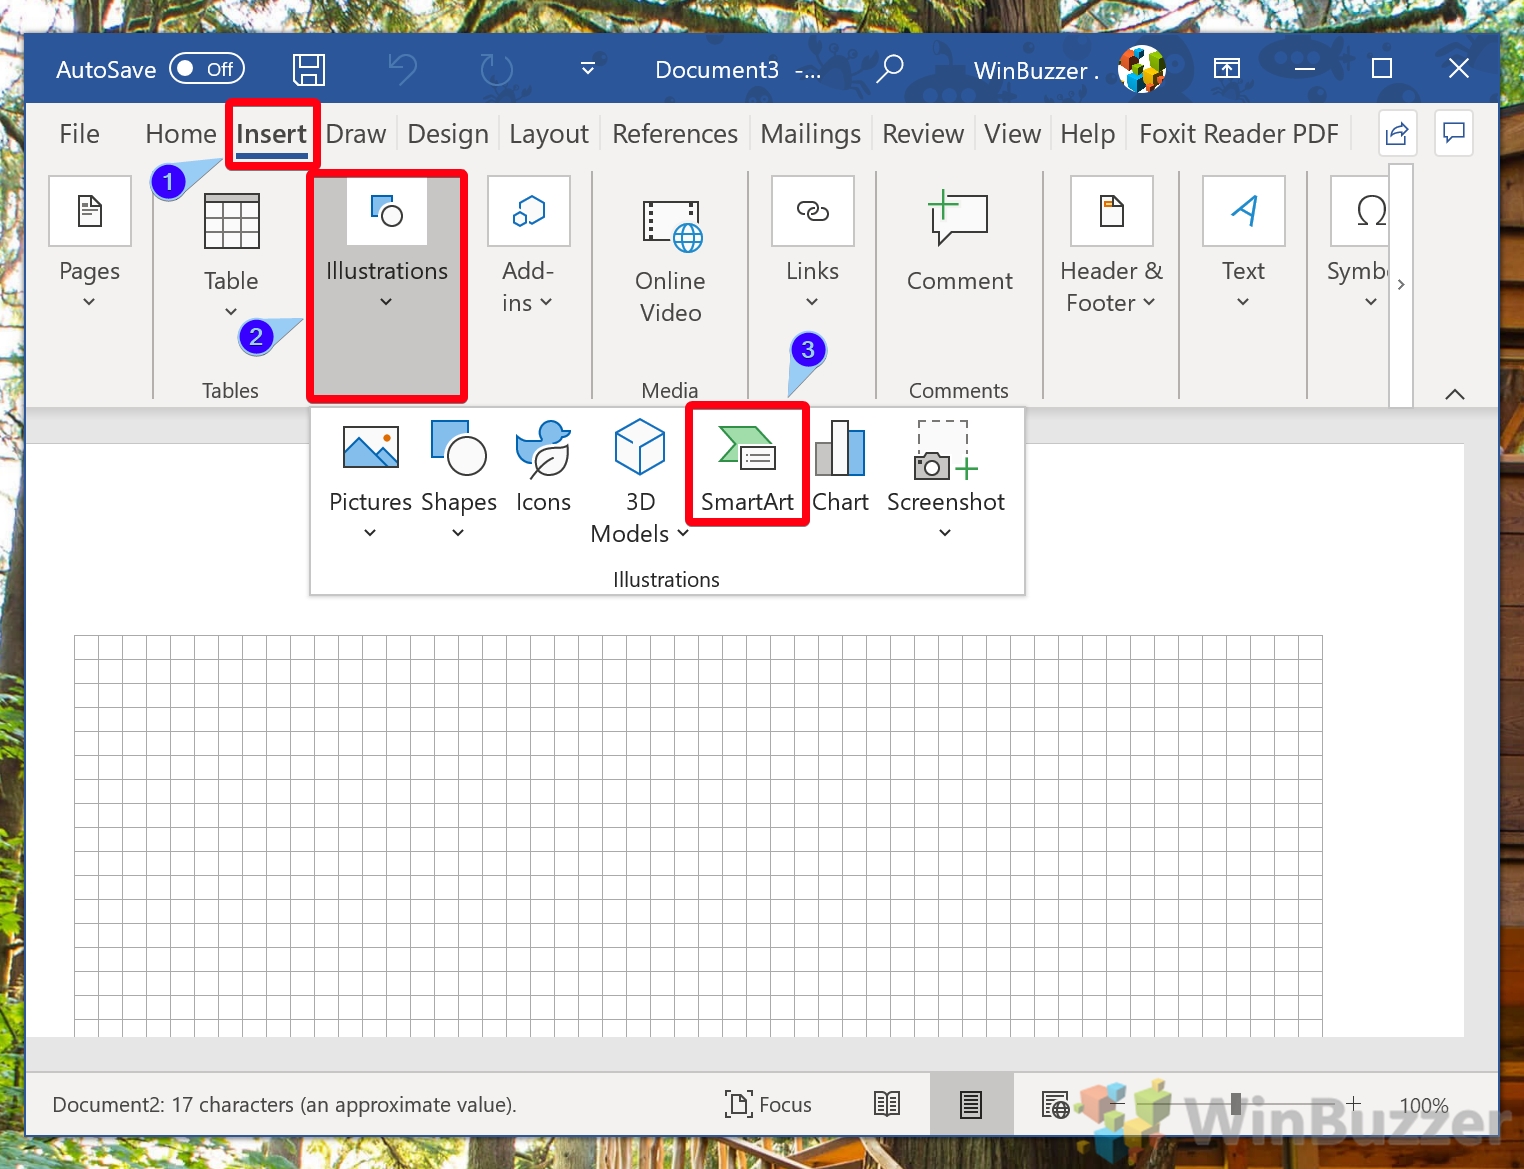
Two ways for creating a flowchart in Word In fact, there are two Word flowchart tools you can use: Shapes and SmartArt. If you just want to create a flowchart in Word as quickly as possible, SmartArt is the way forward. It provides several flowchart templates you can pick and customize. The shape tool requires a little more time investment, but still allows you to make your flowchart pretty quickly. The advantage, of course, is that you can make your chart look exactly how you envisioned. This way, you can fit your company’s branding or do some more advanced flows. Today, we’re going to show you how to make a flowchart in Word using both methods. Let’s start with the more complex one, shapes:
How to Create a Flowchart in Word with Shapes
How to Make a Flowchart with SmartArt in Word
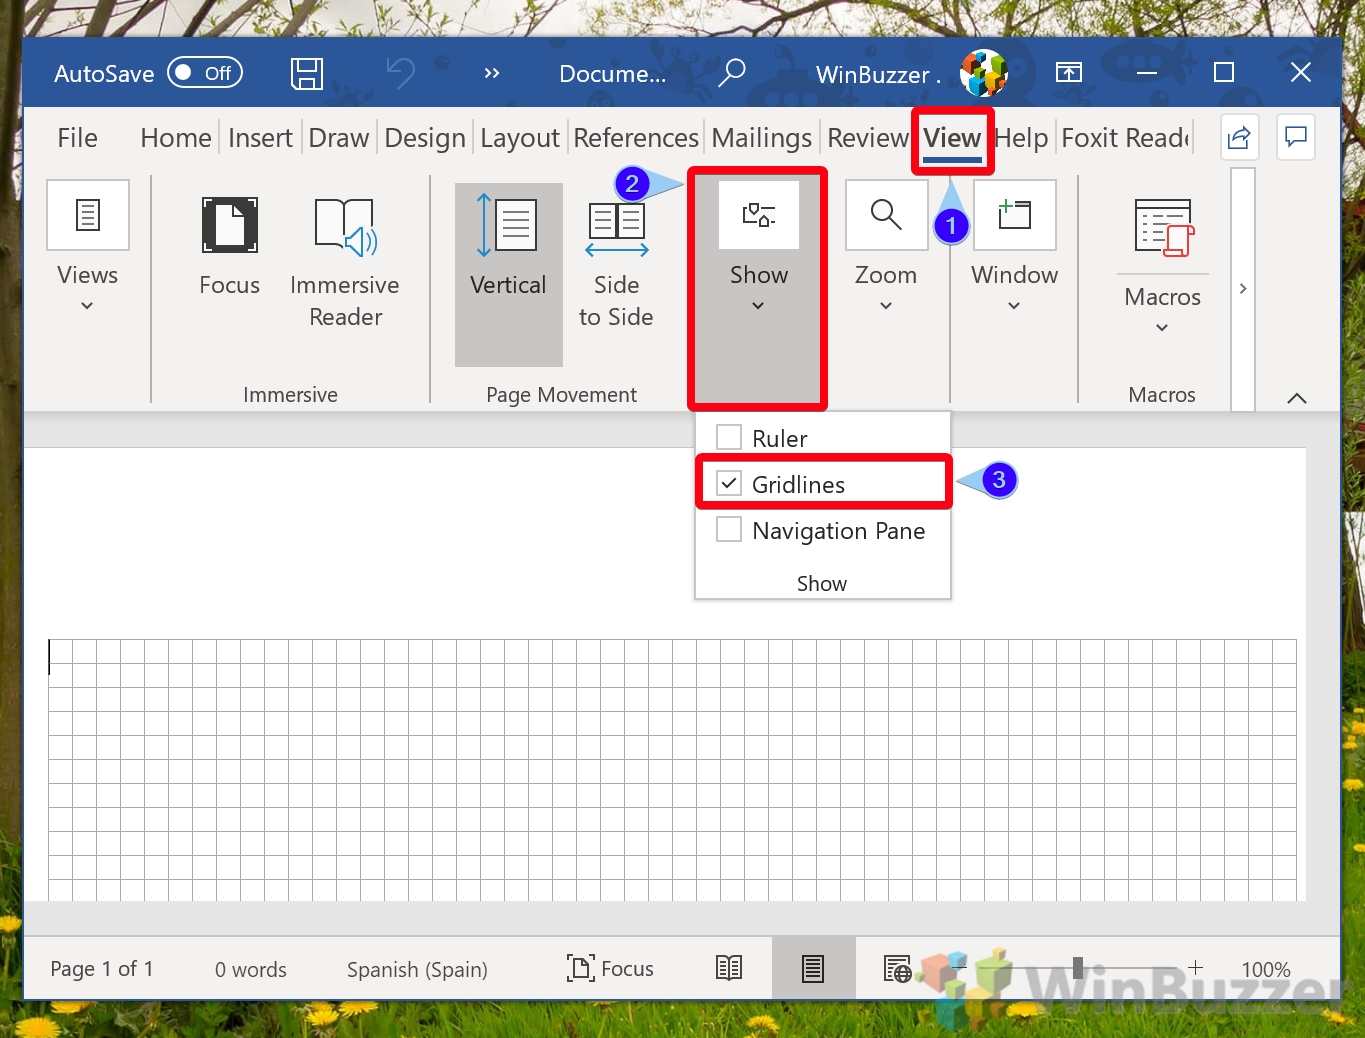
That about wraps up this tutorial. You should now be able to make a flowchart in Word in just a few minutes. If you want to change your background color you can do so via our dedicated Word background color tutorial. If you’re a regular flowchart builder, you may also want to customize your Word ribbon for easy access to the tools in the future. To enable gridlines, click the “View” tab in your Microsoft Word ribbon, press “Show” in the ribbon, and then tick “Gridlines”.
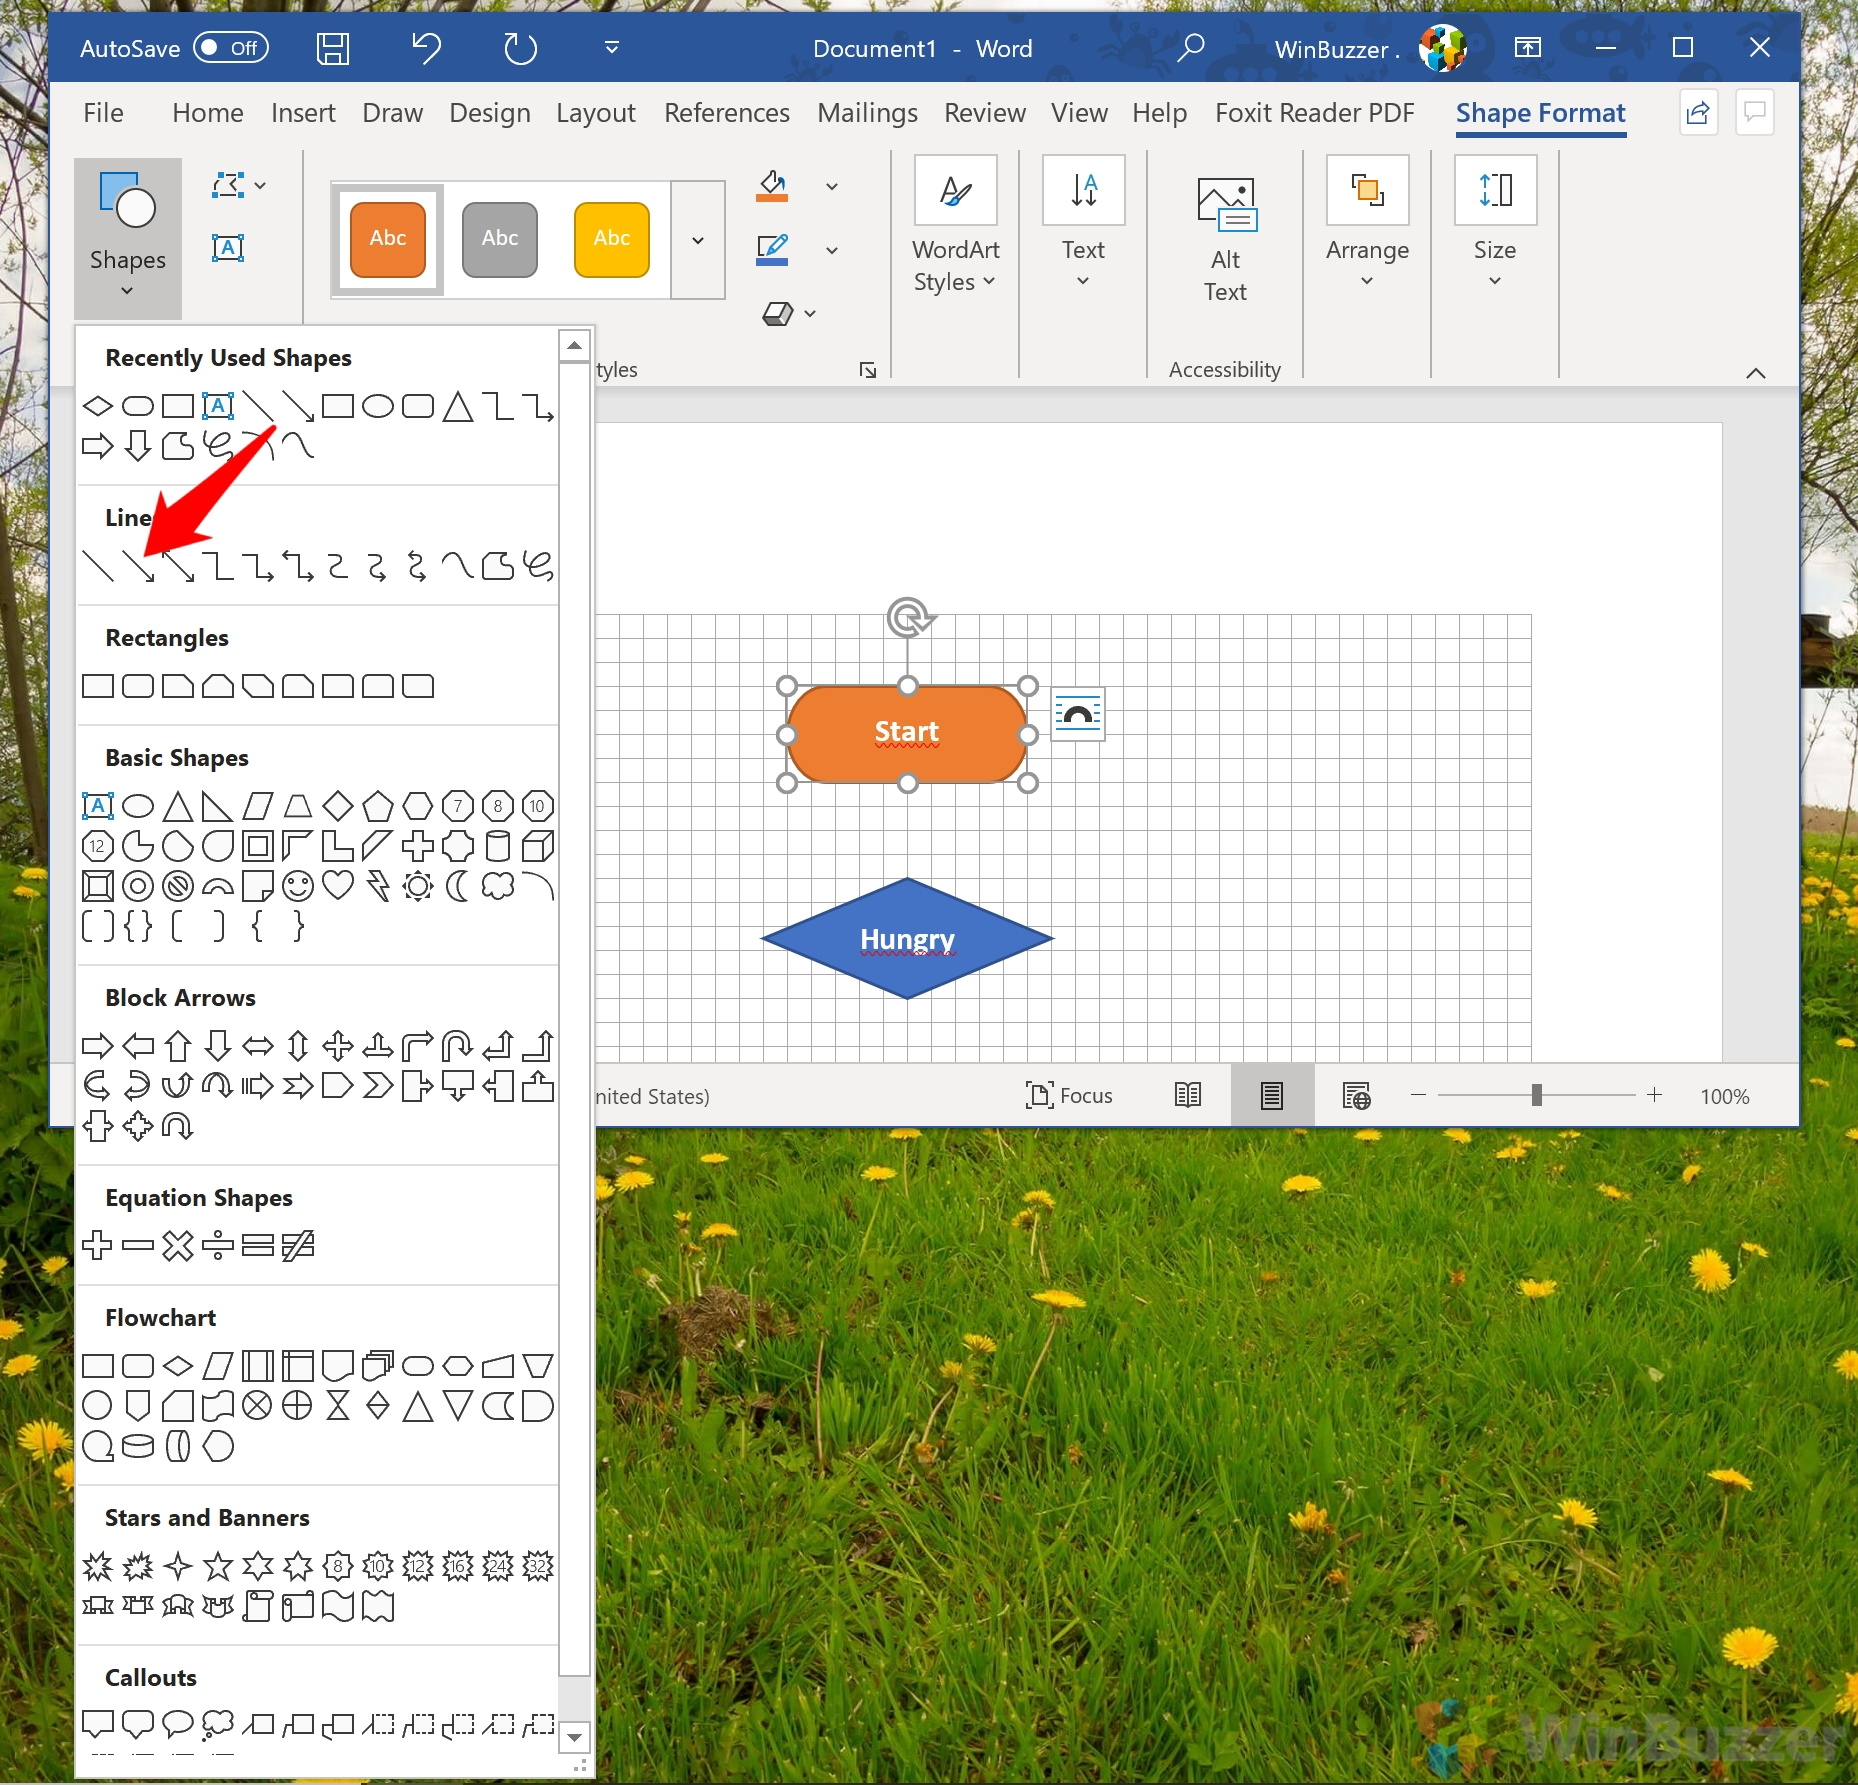
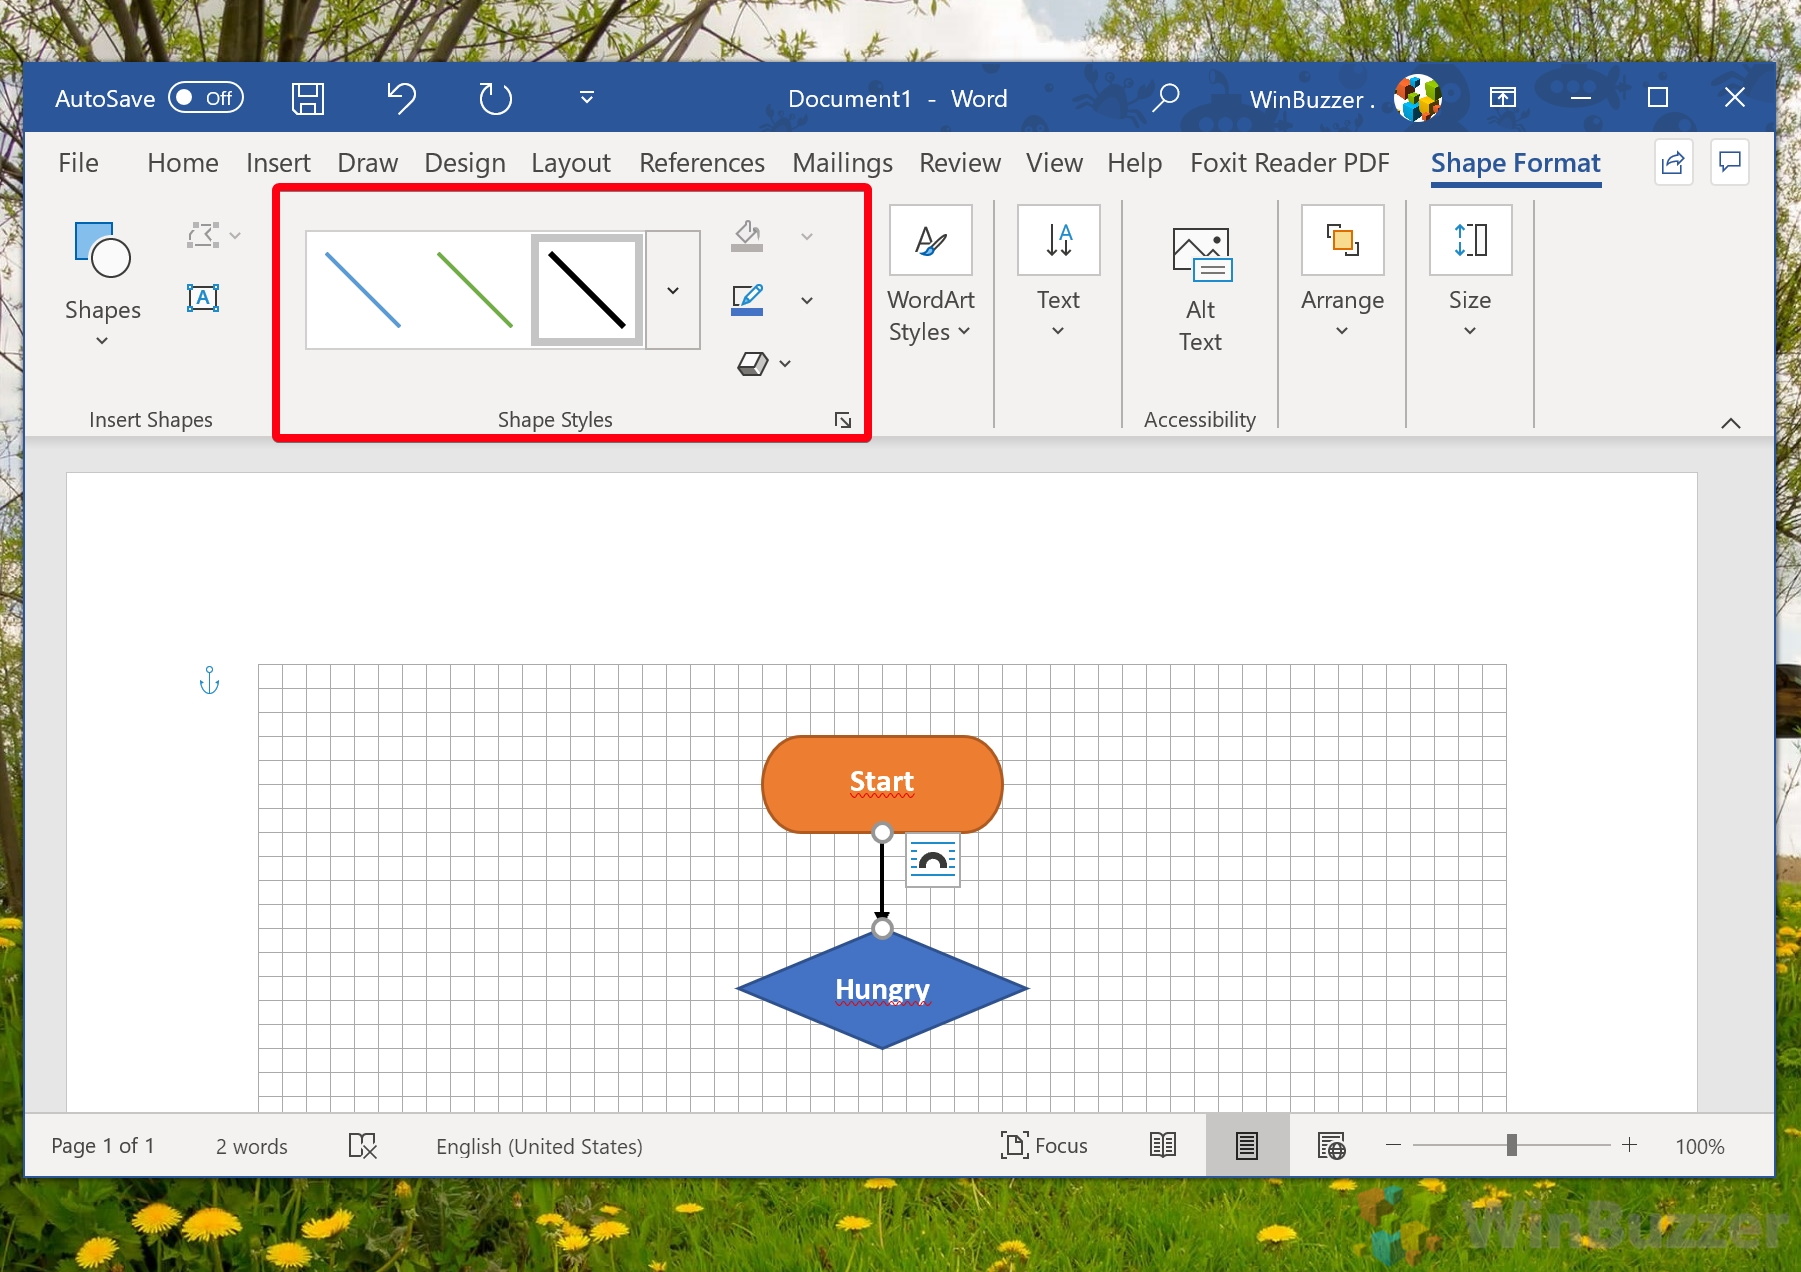
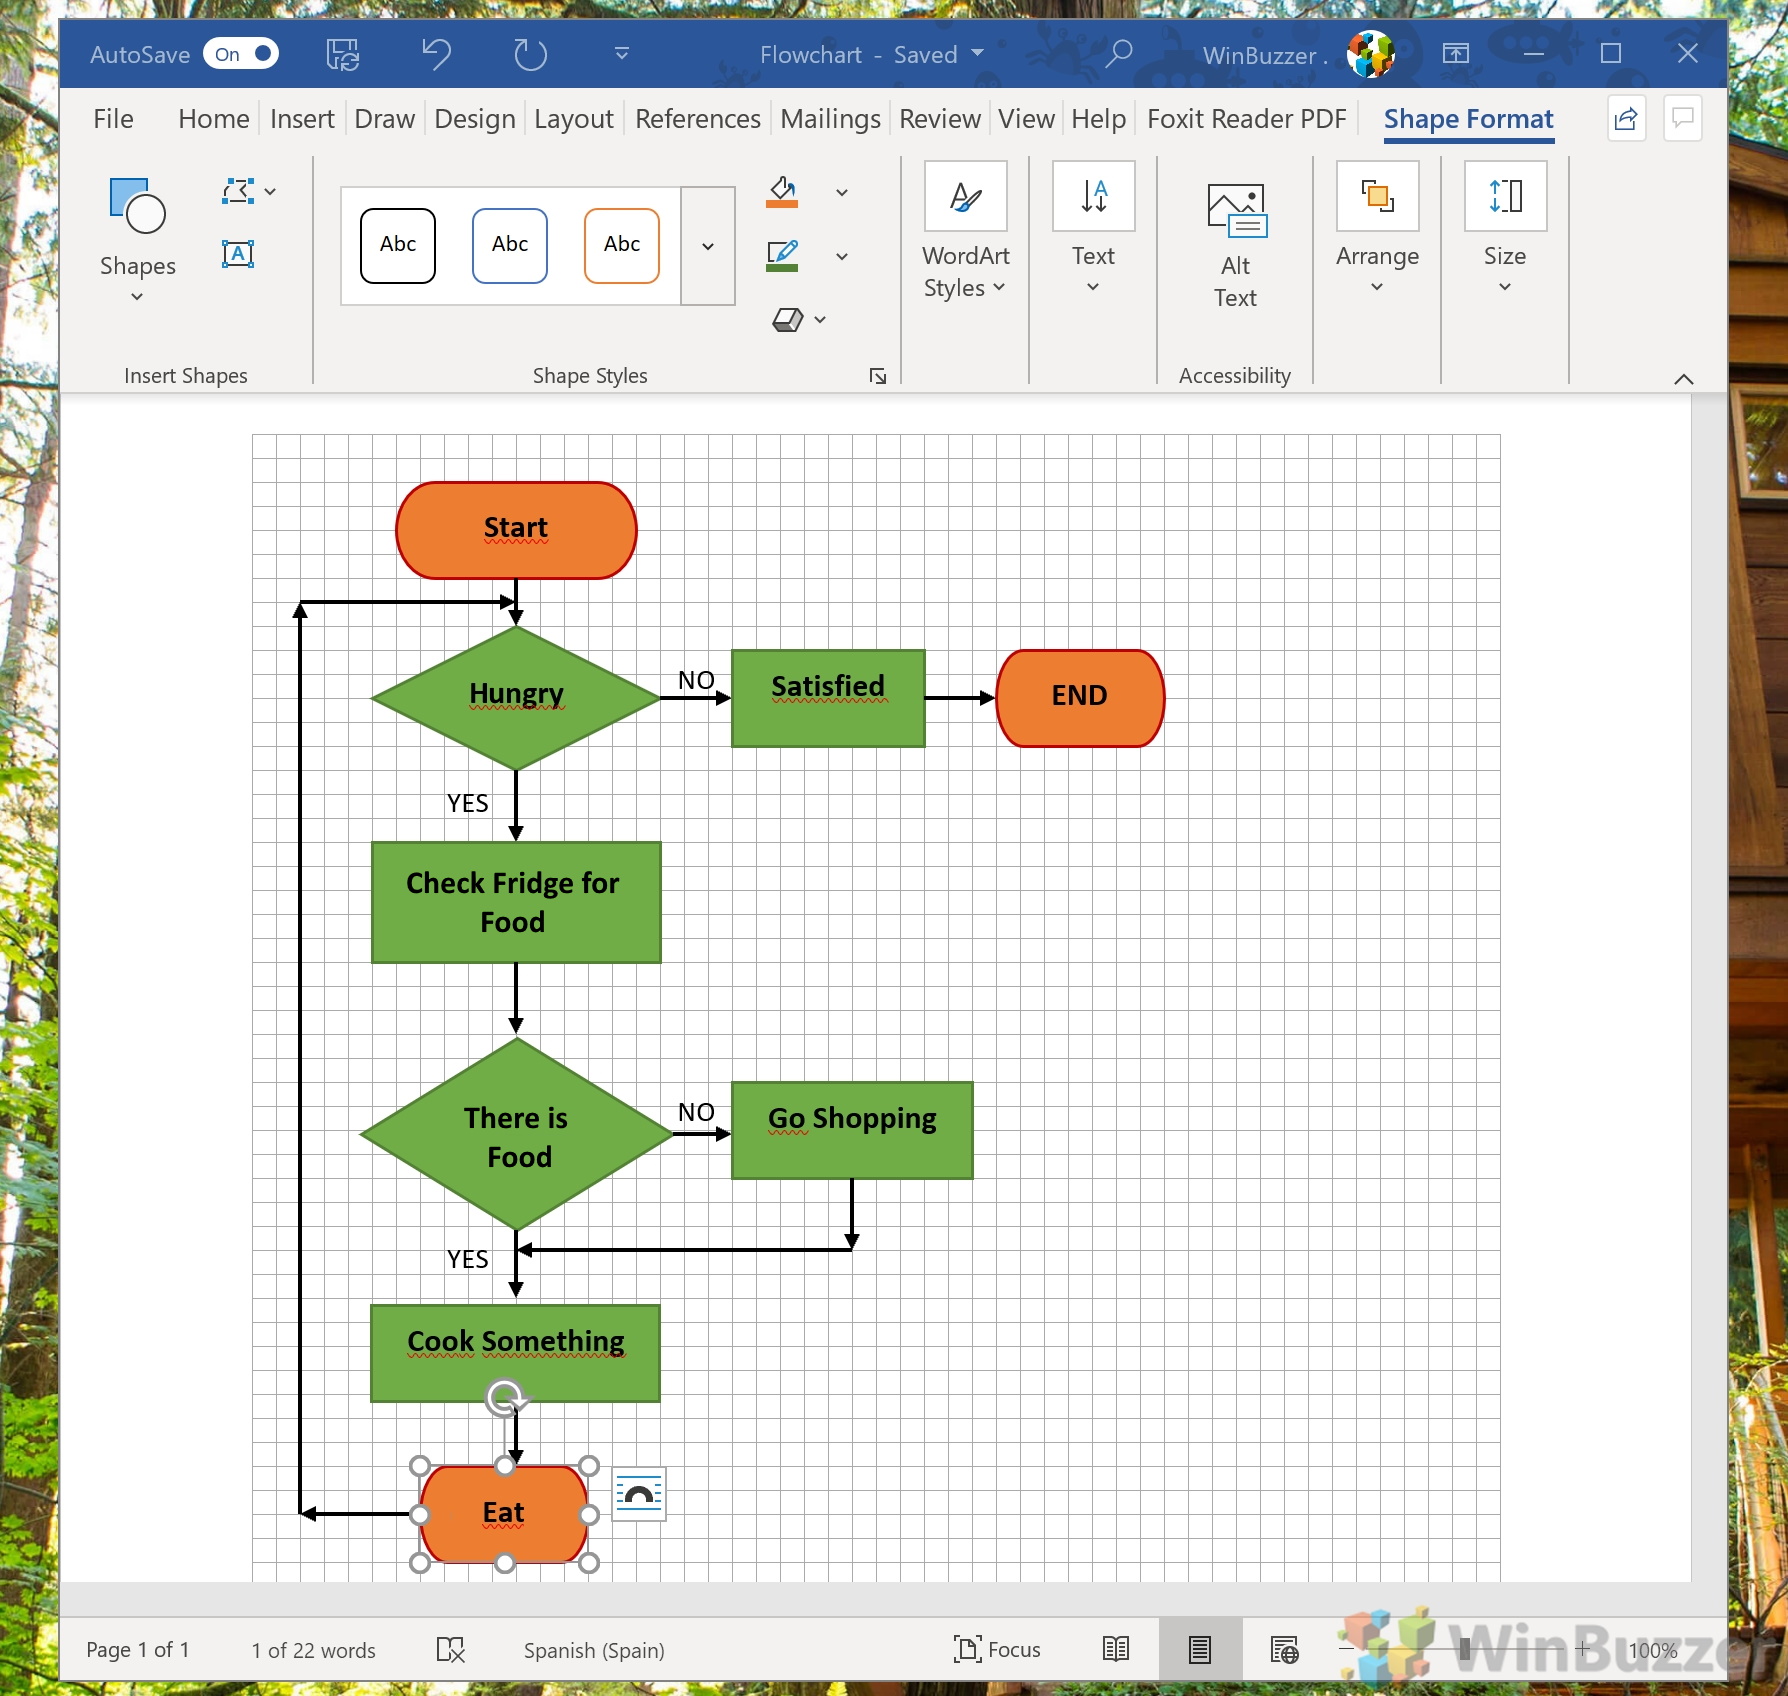
Arrows in Word are found under the “Lines” section and will be one of the most common elements in your flowchart. You have a variety of different types of lines and arrows to fit your process. For the body of your flowchart, you want to look not at the basic shapes section, but the dedicated “Flowchart” category. Here you’ll find anything from squares to diamonds, ovals, triangles, circles, and speech bubbles. It’s worth noting that there are standard shapes that are used for various aspects of a flowchart. You can read on for an explanation of the most important elements.
Ovals indicate the start and end points of a flow, while a diamond shows the point at which a decision needs to be made. A downward triangle indicates a step that combines multiple sets into one, while a circle indicates an inspection point. If you forget these at any point, you can simply hover over their shape for a quick tooltip reminder.
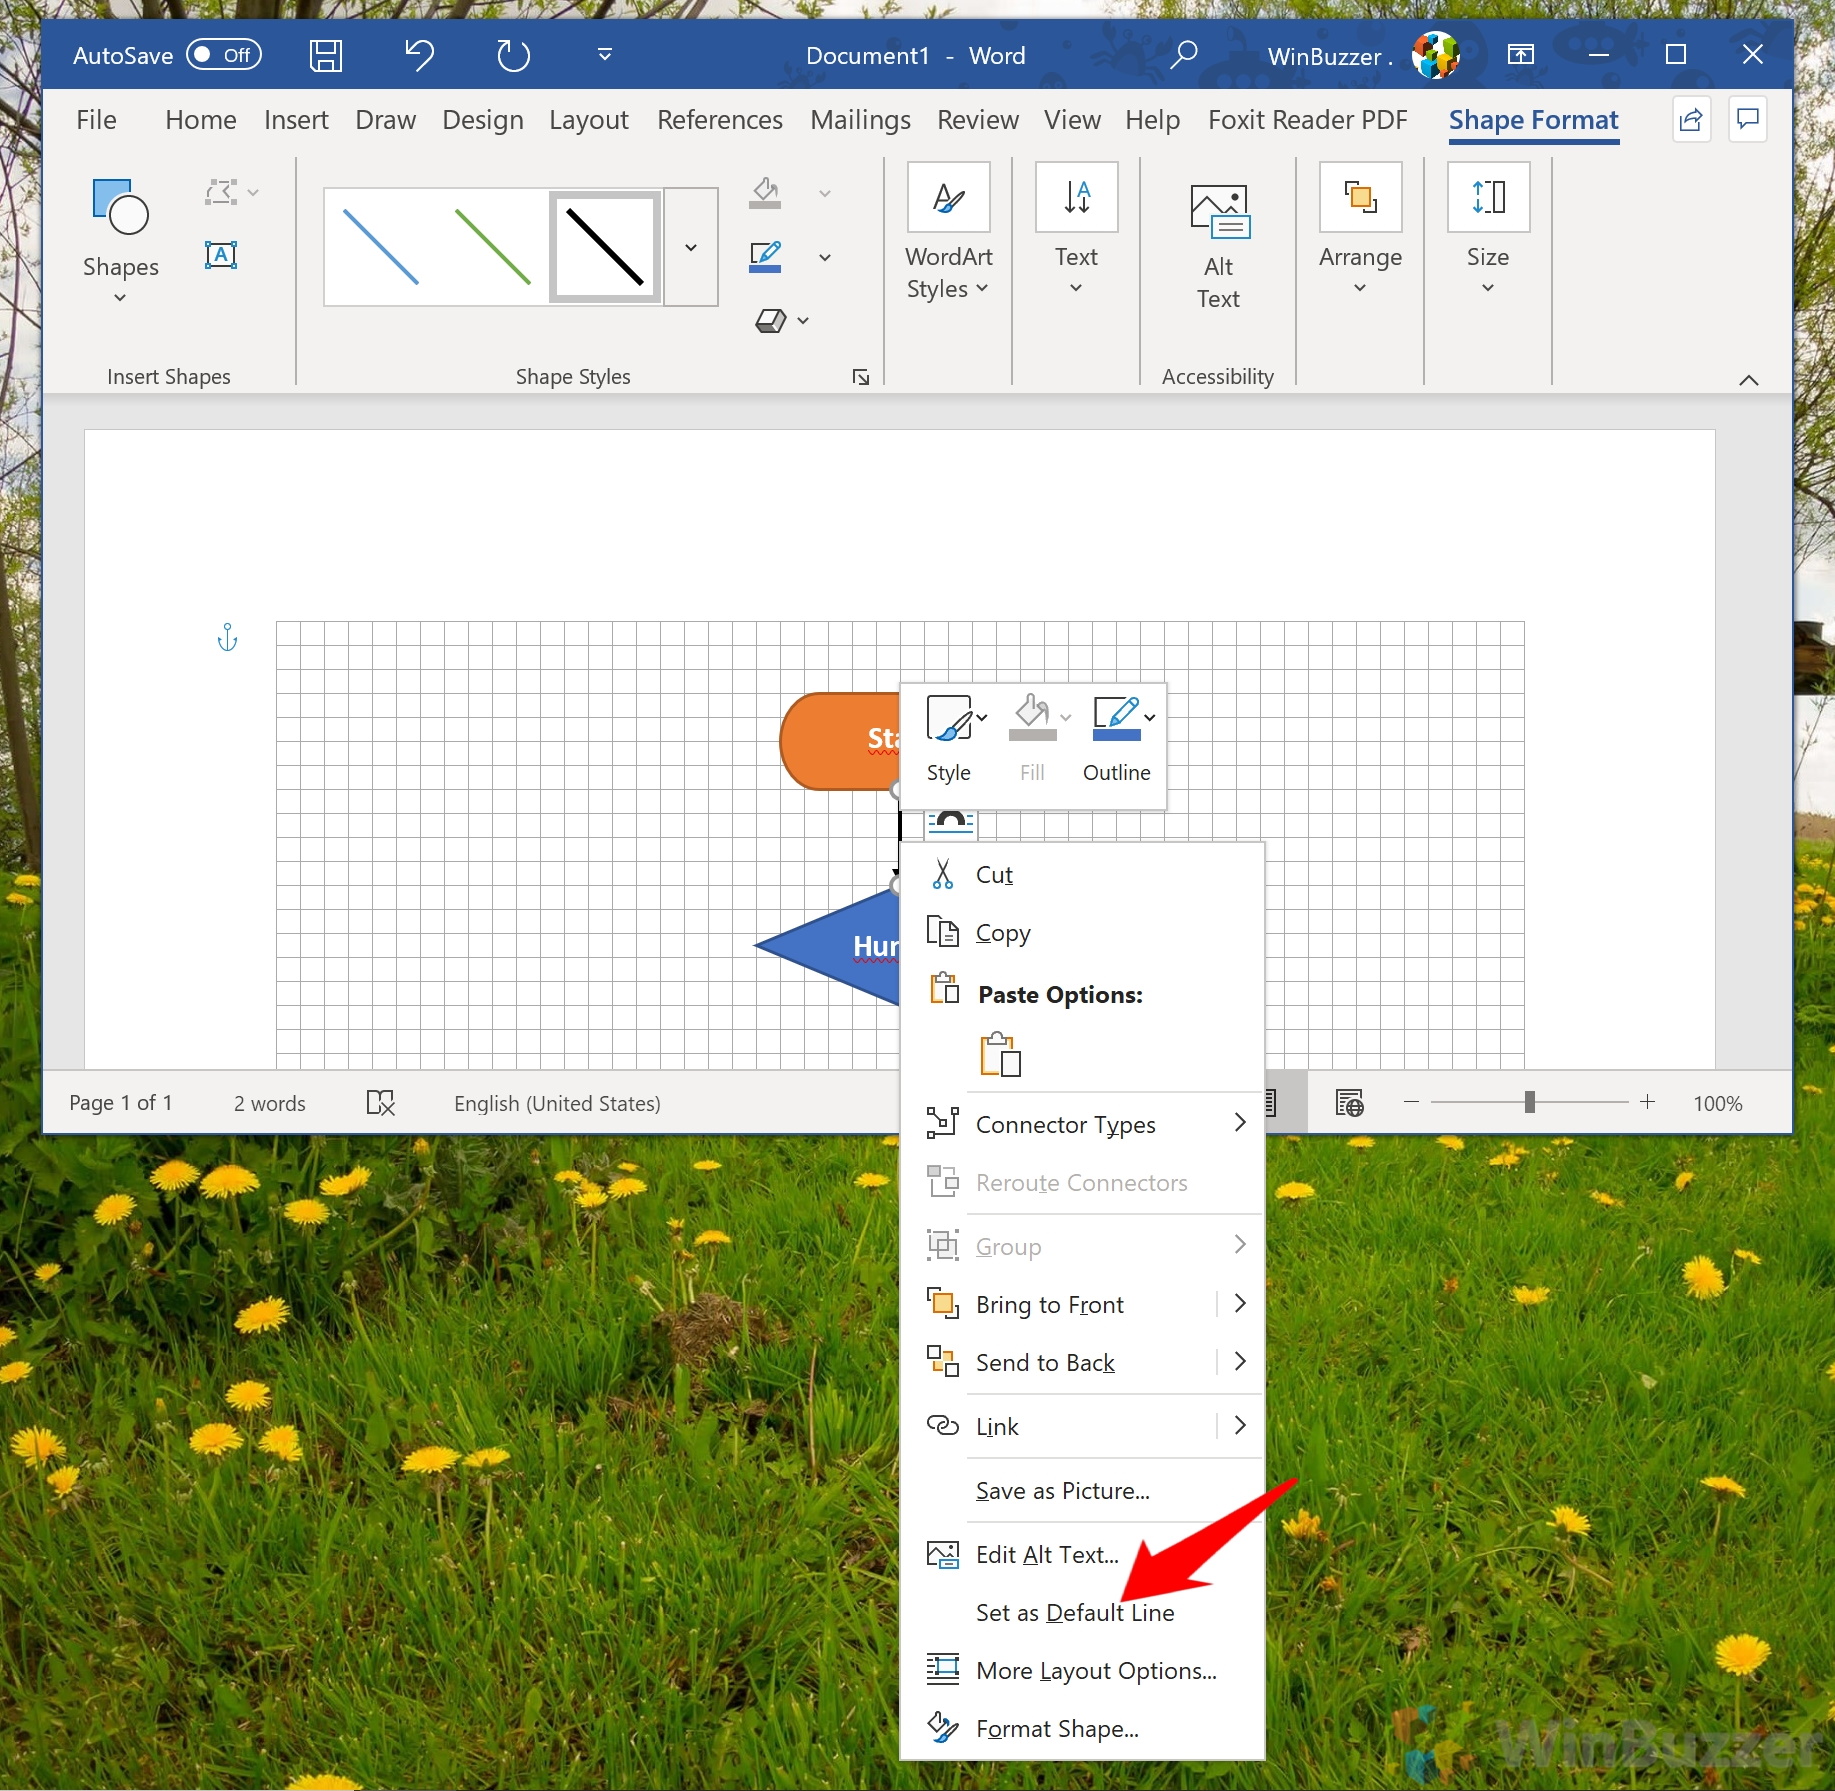
Right-click on the arrow you just created and select “Set as Default Line”. All of your lines and arrows from now on will follow the color and style of the original, saving a lot of manual tweaking.
